Quantcast
Channel: Operation $40K
Viewing all 29 articles
Browse latest View live

Mickey Mouse Christmas Oreo Treats

$
0
0

I have mentioned before how I love using Oreos to decorate for treats! This time we turned them into Mickey and Minnie Mouse Oreo goodness — and it was pretty darned easy to do.

Mickey Mouse Christmas Oreos Treats
Serves: 24
 
Ingredients
  • 1 package of double stuffed oreos
  • 1 bag of mini oreos
  • 1 bag of red candy melts
  • cookie sheet fitted with parchment paper
  • 1 tube of black cookie icing,
  • 1 tube of white cookie icing
  • 1 tube of yellow cookie icing
  • 1 container of Wilton holly melody sprinkles
  • 1 package of bow icing transfers
Instructions
  1. Gently take apart the oreos so that you have one half clean of filling and the filling is on the other half
  2. Take the mini oreos and do the same thing, but scrap off the creme on the mini oreos
  3. Using the black cookie icing, pipe a dollop onto the creme side of the double stuffed marshmallows where Mickeys ears would go.
  4. Place a mini oreo that you split onto the icing
  5. Place the top half of the oreo back on
  6. Using a double boiler, melt the red candy melts until smooth
  7. Take the oreo and dip the bottom half of the cookie into the red candy melts
  8. Lightly shake the cookie to get the excess chocolate off
  9. Place onto the cookie sheet and repeat steps with remaining cookies
  10. Once all cookies have been put together and dipped let dry for 10 minutes before decorating
  11. Split the cookies in half so that you have a even amount of Mickey's and Minnies
  12. Place a small dot of the candy melt still melted onto the back of the icing bow
  13. Place bow in between the "ears" on 12 cookies
  14. Take the black cookie icing and pipe on the belt onto the 12 cookies you will be making into Mickey,
  15. Take the white cookie icing and pipe on a white line on the top of the red chocolate for Minnie
  16. Add some polka dots for Minnie's dress
  17. Using the holly sprinkles add on two green leafs and 3 red dots onto the corner of the red
  18. Using the yellow icing, add the buckle to mickey's belt
  19. Using the white icing, add the white dots to mickey's pants
  20. Let dry for 30 minutes before enjoying!

The post Mickey Mouse Christmas Oreo Treats appeared first on Operation $40K.


Refreshing Candy Cane Moonshine

$
0
0

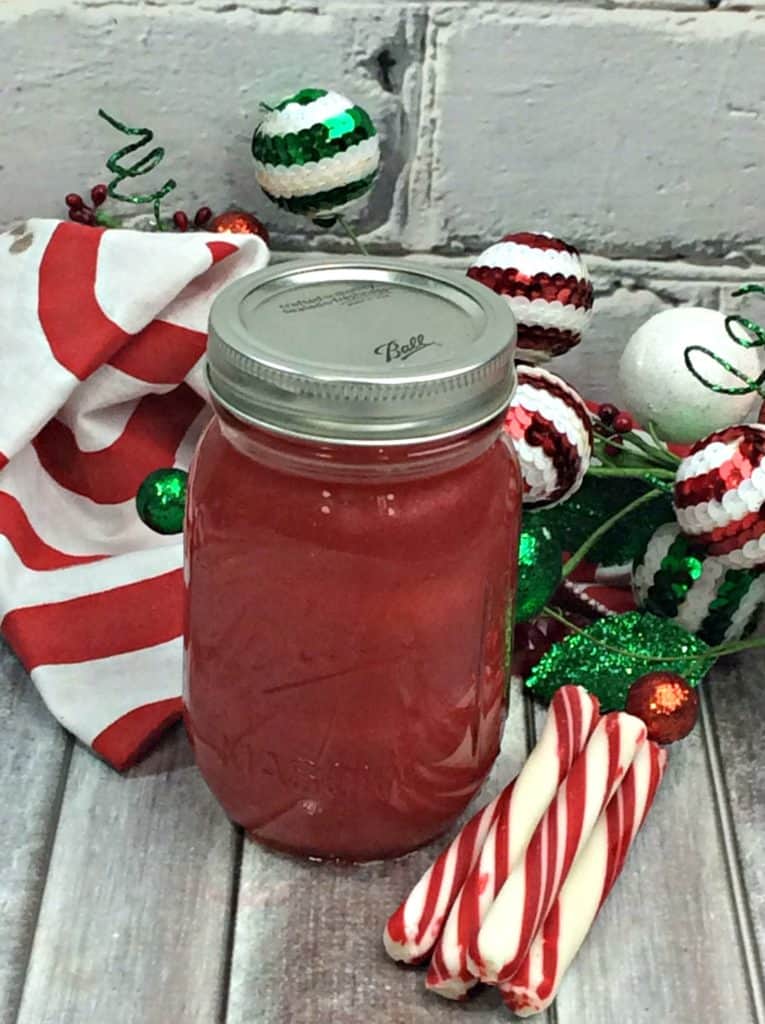
It can be fun to have a different kind of beverage at different times of the year — and Moonshine seems to be uber hot right now! That is why we whipped up our Refreshing Candy Cane Moonshine for this holiday season.

Refreshing Candy Cane Moonshine

Refreshing Candy Cane Moonshine

You will need:
4 Mason Jars
4 tbsp. Simple syrup ( tbsp. in each jar )
4 cups Everclear ( 1 cup in each jar )
16 candy cane sticks ( 4 in each jar )
4 tbsp. Candy cane syrup ( tbsp. in each jar )

Directions:
Fill your Mason jar with candy canes
Add your simple syrup and candy cane syrup into each jar.
Pour your Everclear into each jar until full.
Place the the moonshine in the refrigerator and let it sit for a week before usage.
Drain the liquid into a pitcher using a strainer.
You want to remove all the remains of the candy.
Pour the liquor back into your mason jars and shake to combine …
ENJOY

The post Refreshing Candy Cane Moonshine appeared first on Operation $40K.

Festive and Fun Green Elf Slime

$
0
0

Does the Elf on your shelf bring a treat sometimes? Crazy goodies? Weird baubles? How about something wild and unexpected? Something Green, Glittery? What kid wouldn’t LOVE to have a slimey Elf gag-gift in a cute lil jar! I can just imagine the kid’s faces when they get up in the morning to discover a very Festive and absolutely FUN container of green gooey Elf slime!

Festive and Fun Green Elf Slime

Of course, (even if there’s not an Elf in the picture) this is loads of fun to make WITH the kids, and it may just be a right of passage for our children to gross us out and make us giggle and back away! I’m thinking this might make for a unique and crazy sleepover or playdate activity for the kids. Make sure whomever is bravely diving into this delirious endeavor wears an old Shirt or an apron and don’t forget the Green Glitter for a sparkly fun effect.

**Note: This “recipe” for Elf Slime is just one big Kodak Moment waiting to happen. Be prepared with a camera or vid recorder. You won’t regret it.


Makes 1 8oz mason jar or 2 4oz jars

You will need:

1/2 TBSP baking soda
1 1/2 TBSP contact lens solution
1 6 fl oz Clear Elmer’s Glue
1 TBSP Green Glitter
2 tsp Green food coloring
1 large glass bowl
1 rubber spatula
1 8oz Mason Jar with a lid or 2 4oz jars with lids
**cell phone with camera or a regular camera


Directions:

**Grab your cell or camera and have it ready nearby, just in case.

In the large bowl, combine the clear glue, baking soda, contact solution, glitter, and food coloring and mix with the rubber spatula until combined.

When the slime starts to get firm, it means its done!

**This is where the camera comes in. If you’re on the sidelines helping or supervising, snap a few pictures and be ready for some giggles and adjectives when the hand-scooping begins!

With clean hands, Scoop slime up and place it into the mason jar.

**Yes, use your hands. Much more efficient and fun. Don’t you think?

Now have some fun with it or give as a gift!

The post Festive and Fun Green Elf Slime appeared first on Operation $40K.

Totally Delish Reindeer Sugar Cookies

$
0
0

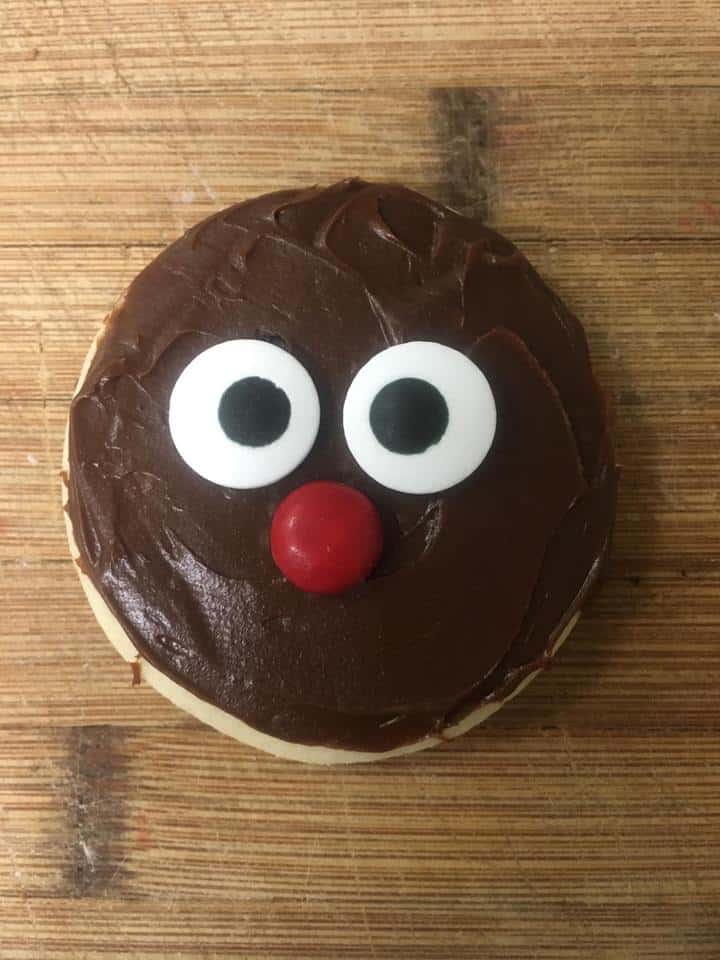
I can’t help it, I am stuck on reindeer this holiday season and it is totally because of my Reindeer Shifter Series that I have been writing. While I am penning the love life of Don, these fun treats popped into my head: Totally Delish Reindeer Sugar Cookies

Totally Delish Reindeer Sugar Cookies Totally Delish Reindeer Sugar Cookies

You will need:

1 C unsalted sweet cream butter, softened
1 C sugar
1 egg
1 tsp vanilla
1/2 tsp almond
2 1/2 C flour
1 tsp baking powder
2 cookie sheets fitted with parchment paper
circle cookie cutter
1 container of chocolate frosting
1 package of large edible eyes
1 package of Wilton royal icing bow transfers
1 package of black candy melts
1 disposable piping bag

Directions

Using a double boiler, melt the black candy melts

Once melted place into the disposable piping bag

Using one of the cookie sheets, pipe out 28 reindeer antlers (extras incase some break)

Set aside to cool completely

Preheat the oven to 325 degrees and cover a cookie sheet with parchment paper.

Using a standing mixer, cream butter and sugar until creamed together and combined.

Beat in egg, vanilla, and almond extract.

In a medium bowl, combine flour and baking powder and use a whisk and mix to combined.

Lightly flour a cutting board

Roll out the dough out on a lightly floured surface to a rectangle shape about 1/2 inch thick

Using the circle cookie cutter, cut the out 12 circles

Bake cookies for 8-10 minutes or until lightly golden brown

Once cookies are done baking, let cool

Take a butterknife and spread on chocolate frosting

Place two large eyes in the top center for the eyes

Place a red M&M under the eyes for the nose

For the girl, place a red bow in the center above the eyes

For the boy, place a black bow in the bottom center below the nose

Carefully peel off and place two antler in the top corners

Enjoy!

The post Totally Delish Reindeer Sugar Cookies appeared first on Operation $40K.

Santa Whiskey Smash

$
0
0

Here is another fun and festive drink for the adults: A Santa Whiskey Smash. It is a fresh take on an old classic and one we find as a nice after dinner drink.

Santa Whiskey Smash

You will need:
1 Cinnamon Flavored Candy Stick
1 tsp. Candy cane syrup ( Torrani )
2oz Whiskey
1/2oz cherry liquor
3oz Pomegranate juice
Sparkling soda to top it off
1-2 crushed candy canes

Directions:
Break the cinnamon Candy stick into pieces and add them to a shaker.
Add crushed candy canes and candy cane syrup and muddle it up in your cocktail glass.
Fill your glass with ice
Add whiskey, cherry liquor, and pomegranate juice and shake it.
Strain the cocktail into the glass.
Top it up with sparkling soda and add some candy cane sticks.

Serve immediately.

Santa Whiskey Smash
Author: 
Recipe type: Drinks
 
Ingredients
  • 1 Cinnamon Flavored Candy Stick
  • 1 tsp. Candy cane syrup ( Torrani )
  • 2oz Whiskey
  • ½oz cherry liquor
  • 3oz Pomegranate juice
  • Sparkling soda to top it off
  • 1-2 crushed candy canes
Instructions
  1. Break the cinnamon candy stick into pieces and add them to a shaker.
  2. Add crushed candy canes and candy cane syrup and muddle it up in your cocktail glass.
  3. Fill your glass with ice
  4. Add whiskey, cherry liquor, and pomegranate juice and shake it.
  5. Strain the cocktail into the glass.
  6. Top it up with sparkling soda and add some candy cane sticks.
  7. Serve immediately.


The post Santa Whiskey Smash appeared first on Operation $40K.

Chocolate Rudolph Cupcakes

$
0
0

Yup, I am totally still on the Reindeer kick and now, I am working on Blitz’s story…he’s Russian! He inspired these Chocolate Rudolph Cupcakes and I had to get these out of my head to see the end of the story come to the page.

Chocolate Rudolph Cupcakes

Makes 12 cupcakes

You will need:

1 box of triple chocolate Cake mix
3 eggs
1/2 C (1 stick) of softened unsalted sweet cream butter
1 1/4 C whole milk
cupcake liners
cupcake pan
1 package of Ghiradelli milk chocolate melting wafers
1 package of black candy melts
1 box of M&M’s only using the red ones
1 package of large edible candy eyes
1 cookie sheet lined with parchment paper
1 disposable piping bag
1 edible marker


Directions for cupcakes:

Preheat oven to 350 and line cupcake pan with the liners

In a medium bowl, combine the cake mix, butter, and milk and mix until combined

Using a medium ice cream scoop, scoop the batter into the cupcake liners and fill about 3/4 of the way full

Bake in the oven for about 21 minutes

Pull out and place on the side to cool

Using a double boiler melt the black candy melts

Once melted, pour into piping bag and set aside

Using an edible marker,  gently draw an outline of 24 antlers on parchment paper

Cut off the tip of the piping bag and pipe out the antlers

Place antlers in the fridge to “harden”

Wash out the candy melts and dry before melting the milk chocolate wafers

Once melted, dip the cupcake into the chocolate

Carefully shake off excess chocolate

Dip remaining 11 cupcakes into the chocolate and let sit for 2 minutes before placing on the face

Place a red M&M into the center for the reindeers nose

Place two large edible eyes above the nose in the corner

Using a sharp knife, make a indention into the cupcake where the antlers go

Carefully peel off the antlers from the parchment paper and slide into the indention

Repeat steps with remaining cupcakes

Enjoy!


5.0 from 1 reviews
Chocolate Rudolph Cupcakes
Author: 
Recipe type: Dessert
Serves: 12
 
Ingredients
  • 1 box of triple chocolate Cake mix
  • 3 eggs
  • ½ C (1 stick) of softened unsalted sweet cream butter
  • 1¼ C whole milk
  • cupcake liners
  • cupcake pan
  • 1 package of Ghiradelli milk chocolate melting wafers
  • 1 package of black candy melts
  • 1 box of M&M's only using the red ones
  • 1 package of large edible candy eyes
  • 1 cookie sheet lined with parchment paper
  • 1 disposable piping bag
  • 1 edible marker
Instructions
  1. Preheat oven to 350 and line cupcake pan with the liners
  2. In a medium bowl, combine the cake mix, butter, and milk and mix until combined
  3. Using a medium ice cream scoop, scoop the batter into the cupcake liners and fill about ¾ of the way full
  4. Bake in the oven for about 21 minutes
  5. Pull out and place on the side to cool
  6. Using a double boiler melt the black candy melts
  7. Once melted, pour into piping bag and set aside
  8. Using an edible marker,  gently draw an outline of 24 antlers on parchment paper
  9. Cut off the tip of the piping bag and pipe out the antlers
  10. Place antlers in the fridge to "harden"
  11. Wash out the candy melts and dry before melting the milk chocolate wafers
  12. Once melted, dip the cupcake into the chocolate
  13. Carefully shake off excess chocolate
  14. Dip remaining 11 cupcakes into the chocolate and let sit for 2 minutes before placing on the face
  15. Place a red M&M into the center for the reindeers nose
  16. Place two large edible eyes above the nose in the corner
  17. Using a sharp knife, make a indention into the cupcake where the antlers go
  18. Carefully peel off the antlers from the parchment paper and slide into the indention
  19. Repeat steps with remaining cupcakes

The post Chocolate Rudolph Cupcakes appeared first on Operation $40K.

Peanut Butter Blossoms

$
0
0

I know this isn’t an incredible stretch of the imagination but this is a reliable holiday tradition at this house: Peanut Butter Blossoms.

Peanut Butter Blossoms

Makes 2 dozen cookies

You will need:

1/4 C unsalted sweet cream butter
1/2 C sugar
1/2 C brown sugar, packed
1 C peanut butter
1/4 C shortening
1 large egg
1 1/4 C flour
3/4 tsp baking soda
1/2 tsp baking powder
1/4 tsp salt
24 Hershey kisses, unwrapped
1 C sugar to roll the peanut butter cookies in

Directions:

Preheat the oven to 350 degrees

Place parchment paper onto a cookie sheet and set aside

Using a standing mixer, cream together the butter, sugar, brown sugar, and shortening and mix until combined

Add in the egg and mix until combined

In a large bowl, using a whisk mix in the flour, baking powder and salt.

Gradually add in the flour mixture into the wet mixture until combined

Using a ice cream scoop, scoop some cookie dough into your hands and roll into a ball

Roll cookie dough ball into the sugar and then place onto the cookie sheet

Repeat the steps for 11 more cookie dough balls

Bake in the oven for 8-10 minutes

Once pulled out of the oven place Hershey kiss into the cookie and let cool for a few minutes

Place cookies onto a wire rack to cool

Repeat steps with remaining dough

Let cool for a few more minutes before enjoying!

The post Peanut Butter Blossoms appeared first on Operation $40K.

Candy Cane Chocolate Cookies

$
0
0

Every year, I host a cookie exchange party and like to come up with a different and fun recipe to bring to the table. This year I have these Candy Cane Chocolate Cookies.

Candy Cane Chocolate Cookies

This recipe for Candy Cane Chocolate Cookies makes 3 dozen

You will need:

1 C unsalted sweet cream butter, softened
1 1/2 C light brown sugar
1 1/2 C sugar
4 large eggs
2 tsp vanilla
1 C bag of chocolate chips
4 1/2 C flour
1 1/2 tsp baking soda
2 tsp salt
2 bags of Ghiradelli melting chocolate wafers
1 C crushed candy canes

Directions:

Preheat oven to 350

In a standing mixer, cream the butter and sugars together until fluffy

Mix in the eggs, one at a time until fully mixed

Add in the vanilla

In another bowl, combine the dry ingredients

Gradually mix in the dry ingredients and chocolate chips

Mix until well blended

Using a small ice cream scoop, scoop dough onto parchment lined baking sheets, 2 inches apart

Bake 8-11 minutes.

Let cool while you melt the Ghiradelli chocolate

Once chocolate is melted, dip half the cookie into the chocolate

Place onto cookie sheet with parchment paper

Sprinkle crushed candy canes

Let chocolate harden before enjoying!

Candy Cane Chocolate Cookies
Author: 
Recipe type: Dessert
 
Ingredients
  • 1 C unsalted sweet cream butter, softened
  • 1½ C light brown sugar
  • 1½ C sugar
  • 4 large eggs
  • 2 tsp vanilla
  • 1 C bag of chocolate chips
  • 4½ C flour
  • 1½ tsp baking soda
  • 2 tsp salt
  • 2 bags of Ghiradelli melting chocolate wafers
  • 1 C crushed candy canes
Instructions
  1. Preheat oven to 350
  2. In a standing mixer, cream the butter and sugars together until fluffy
  3. Mix in the eggs, one at a time until fully mixed
  4. Add in the vanilla
  5. In another bowl, combine the dry ingredients
  6. Gradually mix in the dry ingredients and chocolate chips
  7. Mix until well blended
  8. Using a small ice cream scoop, scoop dough onto parchment lined baking sheets, 2 inches apart
  9. Bake 8-11 minutes.
  10. Let cool while you melt the Ghiradelli chocolate
  11. Once chocolate is melted, dip half the cookie into the chocolate
  12. Place onto cookie sheet with parchment paper
  13. Sprinkle crushed candy canes
  14. Let chocolate harden before enjoying!

The post Candy Cane Chocolate Cookies appeared first on Operation $40K.


Elf Munch Whimsical Snack Treat

$
0
0

Whether you have a holiday “Elf on a Shelf” that’s visiting your home or not, this sweet munchy treat is a great addition to this festive time of year. I’m sure our elf-hosting readers will find that the Elves will have No trouble at all coming up with a creative and fun way to present this snack for you. Elf Munch is also a nice change of pace from the typical salt/butter popcorn on movie nights or a fun extra big-bowl-o-goodies for holiday get-togethers and parties.

Elf Munch Whimsical Snack Treat

We’re looking forward to discovering what kind of mischief our Elf is going to get into this year, and if we find him face first in a bucket of this delicious addictive snack (aka christmas crack) it’s only because he beat me to it!

Elf Munch Whimsical Snack Treat

You will need:

10 c of popped Kettle Corn (plain popcorn works too)
6 tbsp butter
6 C mini marshmallows
1 C red and green M & M’s
1 box of whopper chocolates
3 drops of green food coloring
1 cookie sheet fitted with parchment paper

Directions:

In a large stock pot melt the butter on low heat

Add in the marshmallows and mix until melted

Add in the green food coloring and mix until combined

Mix in the popcorn and stir until coated

Pour onto the cookie sheet and sprinkle with M&M’s and Whoppers

Let sit for 10 minutes before enjoying!

Note: This is GREAT for those holiday treat bags we like to give out to friends, teachers, classmates, co-workers, mailman, etc. It’s colorful and looks Incredible and yummy!)

The post Elf Munch Whimsical Snack Treat appeared first on Operation $40K.

Elf On The Shelf Cookies

$
0
0

We are right in the middle of Elf on the Shelf season and wouldn’t you know it? This is the favorite recipe of the Elves of the North Pole!  Make sure you share this Elf On The Shelf Cookie recipe with your favorite elf fanatic and whip up a batch for Santa!

Elf On The Shelf Cookies

You will need:

3 C flour
1 TBSP baking powder
1 TBSP baking soda
½ TBSP ground cinnamon
1 tsp salt
1 C unsalted sweet cream butter, softened
1 ½ C sugar
1 ½ C packed brown sugar
3 large eggs, room temp
1 TBSP peppermint extract
2-4 drops of red food coloring
2 C semisweet chocolate chips
1 C Green M&M’s
1 bag of Ghiradelli white chocolate
1 squeeze bottles
1 container of Christmas sprinkles

Directions:

Preheat oven to 350 degrees. Line large cookie sheet with parchment paper.

Combine flour, baking powder, baking soda, cinnamon and salt in a bowl. Whisk ingredients together. Set aside.

Using an electric mixer, beat the butter and both sugars until creamy.

Slowly add one egg at a time to the butter and sugar mixture, beating after each addition.

Add vanilla  and red food coloring, beating to incorporate with the butter, sugar, and egg mixture.

Slowly add the flour mixture, one cup at a time, stirring to combine after each addition.
Mix in the chocolate chips and M&M’s

Using a ¼ cup, scoop out the cookie dough and place on the lined cookie sheet allowing space for baking between each cookie.

Bake the cookies for 15 minutes or until the edges of the cookies are lightly brown.

Using a double boiler melt the white chocolate

Once melted, pour chocolate into the squeeze bottle

Wrap a paper towel around the bottle to keep your hands from burning.

Pipe chocolate onto the cookie

Sprinkle the Christmas sprinkles onto the white icing

Let dry completely for 30 minutes before enjoying!

The post Elf On The Shelf Cookies appeared first on Operation $40K.

Candy Cane Shake Cupcake

$
0
0

Ok — this one is a tad crazy but super impressive for the recipiant. Do you have a secret Santa of sorts? This is perfect for part of the spoiling process, our Candy Cane Shake Cupcake!

Candy Cane Shake Cupcake

Candy Cane shake cupcake

makes 12 cupcakes

You will need:

1/2 C sugar
1/4 C unsalted sweet cream butter, softened
1 large egg, room temperature
1 tsp baking powder
1/4 plus 1/8 tsp baking soda
1 cup all-purpose flour
1/4 plus 1/8 tsp salt
1/4 C heavy cream
1/4 C sour cream
1/2 C crushed candy canes
red food coloring

Cupcake directions:

  • Preheat oven to 350 degrees and line cupcake pan with liners
  • In a standing mixer beat sugar and butter until creamed
  • Add egg and mix until fully incorporated
  • Beat in vanilla extract, salt, baking soda, baking powder.
  • Combine the heavy cream into the wet mixture
  • Add in flour, a little at a time.
  • Add in the sour cream
  • Mix in the candy canes
  • Split batter into two bowls
  • Add a few drops of red food coloring into one bowl and mix
  • Scoop a little bit of both batters into the cupcake liners until about 3/4 full.
  • Bake in oven for about 22 minutes or until the center of the cupcake comes out clean with a toothpick.

Frosting ingredients and directions:

  • 1 C unsalted sweet cream butter, softened
    1 1/2 C powder sugar
    1 tsp peppermint extract
    3-5 tbsp heavy whipping cream
    red gel food coloring
    1 large piping bag fitted with a star tip
  • Using a standing mixer, combine the butter, powder sugar, peppermint extract and heavy whipping cream and mix until combined and stiff peaks form
  • Split the frosting into two bowls
  • Add some red food coloring into one of the bowls
  • Place the piping bag into a glass and fold the edge over
  • Using a spoon, scoop some red frosting onto one side of the piping bag
  • Scoop some white frosting onto the other side of the piping bag
  • Pipe frosting onto cooled cupcakes

Decorating ingredients and instructions

  • 2 packages of Hostess mini chocolate doughnuts
  • 1 C white chocolate chips, melted
  • 1 C crushed candy canes
  • 24 mini candy canes
  • 1 squeeze bottle
  • red and white stripped paper straws cut into 3rd’s
  • Directions
  • Place doughnuts onto the baking sheet and set aside
  • Melt the chocolate in 40-30 second and stir occasionally until completely melted
  • Pour the chocolate into a squeeze bottle
  • Wrap a paper towel around the bottle and pipe some white chocolate onto the doughnuts to look like snow
  • Sprinkle crushed candy
  • Let sit for 30 minutes for the chocolate to harden
  • Place doughnut into the center of the frosting
  • Sprinkle some more crushed candy canes onto the frosting
  • Add two mini candy canes into the left side of the frosting
  • Add to straws into the right side of the frosting
  • Enjoy!  

The post Candy Cane Shake Cupcake appeared first on Operation $40K.

Elf Naughty Candy Moonshine

$
0
0
This drink recipe is perfect for a night in front of the fireplace or a movie & blanket kind of evening. It’s also a wonderful idea for work or family and friend parties during the holidays.
While it does have to sit in the refrigerator for a full week before it can be served, it’s well worth the wait for the taste and especially the smell. Candy cane flavored drinks are certainly not common but will be very popular once you and your guests try it! Be prepared to share the recipe. Enjoy!

Elf Naughty Candy Moonshine
Author: 
Recipe type: Drinks
 
Ingredients
  • 4 tbsp. Simple syrup (1 bsp. in each jar)
  • 4 cups Everclear (1 cup in each jar}
  • 16 candy cane sticks (4 in each jar)
  • 4 tbsp. peppermint (1 tbsp. in each jar)
  • 4 Mason Jars
Instructions
  1. Fill your mason jar with cinnamon candy cane sticks
  2. Add your simple syrup and peppermint syrup into each jar.
  3. Pour your Everclear into each jar until full.
  4. Place the the moonshine in the refrigerator and let it sit for a week before usage.
  5. Drain the liquid into a pitcher using a strainer.
  6. You want to remove all the remains of the candy.
  7. Pour the liquor back into your mason jars, attach lid firmly and shake to combine.
  8. ENJOY


The post Elf Naughty Candy Moonshine appeared first on Operation $40K.

Mickey Mouse Swirl Cookies

$
0
0

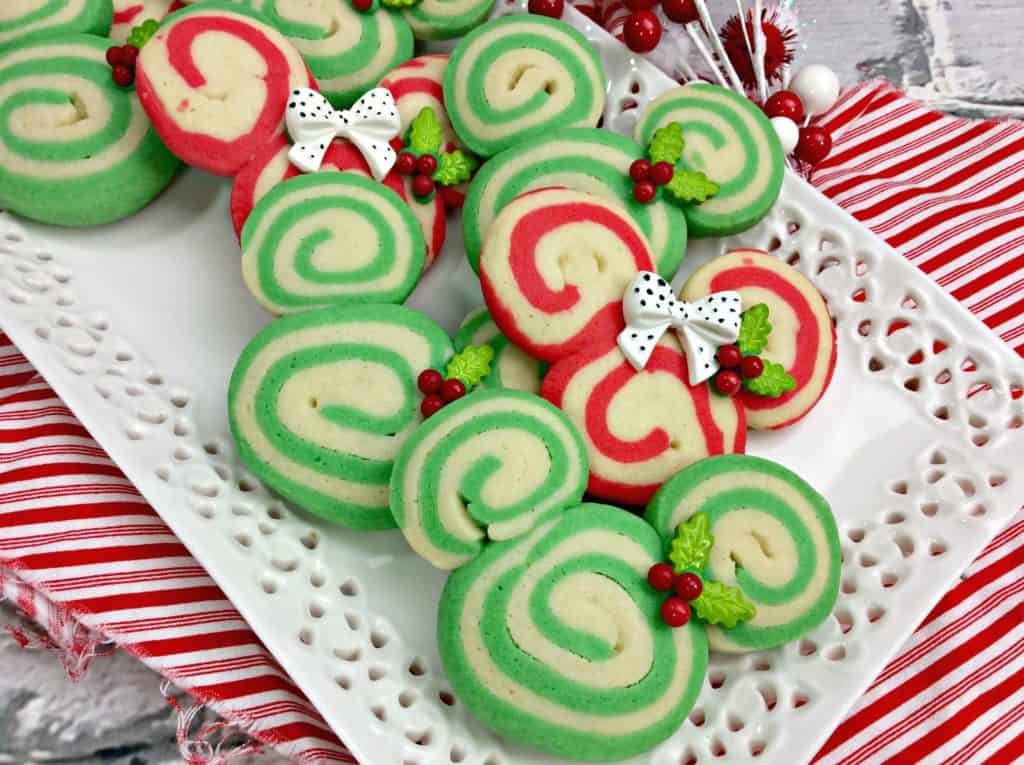
They’re cute, festive and delicious! Share with friends, family and co-workers and you’re sure to put a smile on some faces this holiday season!

Mickey Mouse Swirl Cookies

Makes 24 cookies

You will need: 
1 C unsalted sweet cream butter, softened
1 1/2 C powder sugar
1 egg
2 tsp vanilla
2 1/2 C flour
1 tsp baking soda
1 tsp cream of tartar
cookie sheet fitted with parchment paper
red and green food coloring
Wilton holly melody sprinkles
1 box of Wilton royal icing bows
1 white tube of cookie icing
tweezers

Directions:

In a standing mixer, combine butter, powder sugar, egg and vanilla and mix on medium speed until combined and fluffy

In a large bowl, combine the flour, baking soda, and cream of tarter.

Gradually add in the flour to the wet mixture and mix on low speed until combined

Once dough has formed, place dough onto a lightly floured cutting board

Cut the dough into 4 parts

Take 1/4 of the dough and add green food coloring and mix till combined

Take another 1/4 part of the dough and add red food coloring and mix till combined

You should still have two 1/4 parts

Place a sheet of parchment paper onto the cutting board

Place the red dough onto the parchment paper, sprinkle some flour around it and place another sheet over it

Using a rolling pin, roll out the dough to 1 inch thick rectangle

Cut the edges to clean up the rectangle

Repeat steps with a plain dough

Carefully lift the plain rectangle dough and place it on top of the red dough

Using the parchment paper to help, roll the dough into a log

Cut log in half

Roll 1 of the half logs into a smaller log for the ears

Fold edges of parchment paper and place cookie logs onto a cookie sheet

Repeat steps with the green and other plain dough

Place cookie sheet into the fridge for over night

Preheat the oven to 350 degrees

Using a sharp knife, cut the cookie dough logs into 2 inch circles

Place a big circle and two small circles onto the cookie sheet in the shape of Mickey’s head

Bake in the oven for 8-10 minutes or until slightly golden brown

Once cookies are baked, pick which ones you want to be Minnie and Which ones you want to be Mickey

Using the cookie icing, add a small dollop onto the back of the icing bow and place in the middle of the big circle in between the ears

Repeat steps with all Minnie cookies

Using the cookie icing, pipe on a small dot onto the back of the holly sprinkles and place into the top right corner

Repeat steps with all cookies

Let dry for 20 minutes before enjoying


Mickey Mouse Swirl Cookies
Author: 
Recipe type: Desserts
 
Ingredients
  • 1 C unsalted sweet cream butter, softened
  • 1½ C powder sugar
  • 1 egg
  • 2 tsp vanilla
  • 2½ C flour
  • 1 tsp baking soda
  • 1 tsp cream of tartar
  • cookie sheet fitted with parchment paper
  • red and green food coloring
  • Wilton holly melody sprinkles
  • 1 box of Wilton royal icing bows
  • 1 white tube of cookie icing
  • tweezers
Instructions
  1. In a standing mixer, combine butter, powder sugar, egg and vanilla and mix on medium speed until combined and fluffy
  2. In a large bowl, combine the flour, baking soda, and cream of tarter.
  3. Gradually add in the flour to the wet mixture and mix on low speed until combined
  4. Once dough has formed, place dough onto a lightly floured cutting board
  5. Cut the dough into 4 parts
  6. Take ¼ of the dough and add green food coloring and mix till combined
  7. Take another ¼ part of the dough and add red food coloring and mix till combined
  8. You should still have two ¼ parts
  9. Place a sheet of parchment paper onto the cutting board
  10. Place the red dough onto the parchment paper, sprinkle some flour around it and place another sheet over it
  11. Using a rolling pin, roll out the dough to 1 inch thick rectangle
  12. Cut the edges to clean up the rectangle
  13. Repeat steps with a plain dough
  14. Carefully lift the plain rectangle dough and place it on top of the red dough
  15. Using the parchment paper to help, roll the dough into a log
  16. Cut log in half
  17. Roll 1 of the half logs into a smaller log for the ears
  18. Fold edges of parchment paper and place cookie logs onto a cookie sheet
  19. Repeat steps with the green and other plain dough
  20. Place cookie sheet into the fridge for over night
  21. Preheat the oven to 350 degrees
  22. Using a sharp knife, cut the cookie dough logs into 2 inch circles
  23. Place a big circle and two small circles onto the cookie sheet in the shape of Mickey's head
  24. Bake in the oven for 8-10 minutes or until slightly golden brown
  25. Once cookies are baked, pick which ones you want to be Minnie and Which ones you want to be Mickey
  26. Using the cookie icing, add a small dollop onto the back of the icing bow and place in the middle of the big circle in between the ears
  27. Repeat steps with all Minnie cookies
  28. Using the cookie icing, pipe on a small dot onto the back of the holly sprinkles and place into the top right corner
  29. Repeat steps with all cookies
  30. Let dry for 20 minutes before enjoying

The post Mickey Mouse Swirl Cookies appeared first on Operation $40K.

Mickey Mouse Chocolate Moose Dessert Cups

$
0
0

I love whimsical desserts and am totally in love with this candy mold! The possibilities are endless and this time we have whipped up Mickey Mouse Chocolate Moose Dessert Cups that look like Rudolph.

Mickey Mouse Chocolate Moose Dessert Cups

1 silicone shot glass mold (found at Michael’s)
16 oz Ghiradelli melting chocolate wafers, 16 wafers set aside for the ears
1 package of small edible eyes
1 box of mini peppermint candy canes
8 red M&M’s

Chocolate Mousse:

4 large egg yolks
1/4 C sugar
1 C heavy whipping cream
6 oz semi sweet chocolate chips
1 1/2 C heavy whipping cream
1 piping bag with a medium star tip

Directions:

Using a double boiler, melt the chocolate

Once melted, pour chocolate into the silicon molds and place into the freezer over night

Mousse directions:

Using a standing mixer, beat egg yolks until thick and creamy yellow color

Gradually beat in sugar until combined

Using a small pot, heat 1 cup whipping cream over medium heat until hot.

Gradually stir at least half of the hot whipping cream into egg yolk mixture

Pour mixture back into the pot

Cook over low heat about 5 minutes, stirring constantly, until mixture thickens

Stir in chocolate chips until melted.

Cover and refrigerate overnight

Next day:

Pop out the chocolate cups

Melt a small amount of chocolate for glue

Dip the eyes into the melted chocolate and place onto the chocolate cups

Dip the back of the red M&M into the chocolate and place onto the chocolate cup under the eyes

In a standing mixer, beat 1 1/2 cups whipping cream until stiff peaks form.

Fold chocolate mixture into whipped cream.

Scoop into piping bag

Pipe mousse into the center of the chocolate cup

Place a mini candy cane in each side for the antlers

Place two chocolate wafer in front of each candy cane for the ears

Enjoy!


Mickey Mouse Cups
Author: 
Recipe type: Desserts
Serves: 8 cups
 
Ingredients
  • 1 silicone shot glass mold (found at Michael's)
  • 16 oz ghiradelli melting chocolate wafers, 16 wafers set aside for the ears
  • 1 package of small edible eyes
  • 1 box of mini peppermint candy canes
  • 8 red M&M's
  • Chocolate mousse ingredients
  • 4 large egg yolks
  • ¼ C sugar
  • 1 C heavy whipping cream
  • 6 oz semi sweet chocolate chips
  • 1½ C heavy whipping cream
  • 1 piping bag with a medium star tip
Instructions
  1. Using a double boiler, melt the chocolate
  2. Once melted, pour chocolate into the silicone molds and place into the freezer over night
  3. Mousse directions
  4. Using a standing mixer, beat egg yolks until thick and creamy yellow color
  5. Gradually beat in sugar until combined
  6. Using a small pot, heat 1 cup whipping cream over medium heat until hot.
  7. Gradually stir at least half of the hot whipping cream into egg yolk mixture
  8. Pour mixture back into the pot
  9. Cook over low heat about 5 minutes, stirring constantly, until mixture thickens
  10. Stir in chocolate chips until melted.
  11. Cover and refrigerate overnight
  12. Next day: Pop out the chocolate cups
  13. Melt a small amount of chocolate for glue
  14. Dip the eyes into the melted chocolate and place onto the chocolate cups
  15. Dip the back of the red M&M into the chocolate and place onto the chocolate cup under the eyes
  16. In a standing mixer, beat 1½ cups whipping cream until stiff peaks form.
  17. Fold chocolate mixture into whipped cream.
  18. Scoop into piping bag
  19. Pipe mousse into the center of the chocolate cup
  20. Place a mini candy cane in each side for the antlers
  21. Place two chocolate wafer in front of each candy cane for the ears
  22. Enjoy!

The post Mickey Mouse Chocolate Moose Dessert Cups appeared first on Operation $40K.

Olaf Rice Krispy Treats

$
0
0

Here is another fun treat for the Olaf clip at the bottom of this post – to celebrate “that time of year”. These Olaf Rice Krispy Treats are pretty easy to make and even better to eat!

Olaf Rice Krispy Treats

You will need:

1 box of rice krispy treats, unwrapped 
2 bags of Ghiradelli white chocolate melting wafers
1 bag of m & m’s green and red picked out
1 package of large edible eyes
4 red and green airheads
1 tube of orange cookie icing
1 tube of black cookie icing
1 cookie sheet fitted with parchment paper

Directions:

Using a double boiler, melt both bags of white chocolate

Once chocolate is melted, place the rice krispy treat into the chocolate and using a fork, flip it over until it is completely coated

Carefully pick up the rice krispy treat and lightly tap the edge of the pot to get rid of excess chocolate

Place rice krispy treat onto the cookie sheet and then place two eyes onto the top area of the rice krispy treat

Let chocolate harden for about 10 minutes

Using the orange cookie icing, pipe on the snowman’s nose

Using the black cookie icing, pipe on the mouth

Let dry for 10 minutes while you cut the airhead

Place unwrapped airheads onto a cutting board and cut 3 strips.

Place a strip of airhead onto the top of the rice krispy treat and press the sides slightly down into the rice krispy treat

Matching colors of the M&M’s to the airhead, place a red M&M into the melted chocolate and place onto the bottom of the airhead on the side

Let sit there for 5 minutes before repeating step with the other side

Repeat steps with remaining rice krispy treats.

The post Olaf Rice Krispy Treats appeared first on Operation $40K.

Candy Cane Spiced Latte Cocktail

$
0
0
Do you like chocolate? Are you a fan of lattes? Peppermint? Here, the three of them come together in an incredibly smooth hot drink that will put a smile on anyone’s face, especially since there’s whipped cream and Vodka involved!
A heavenly combination of flavors blends together to make this Candy Cane Spiced Latte Cocktail.  Just go ahead and bookmark this one, because it’s  super easy to whip up and it’s going to become one of your favorites.
You will need:
1 cup warmed milk (not boiled) for the froth
1 cup hot coffee
1 tbsp cocoa powder
2 tbs sugar or 1/4 tsp Stevia
1 oz of peppermint vodka
Whipped cream
Crushed candy cane
Directions:
Put the cocoa powder and sugar in the bottom of your coffee mug.
Add the peppermint vodka.
Pour the hot coffee over it and stir.
Froth the milk and pour it over the hot coffee.
Top the coffee with whipped cream and sprinkle on crushed candy canes.
If you really want to be decadent, drizzle some chocolate syrup over the top.

The post Candy Cane Spiced Latte Cocktail appeared first on Operation $40K.

Reindeer Pretzel Treats

$
0
0

(Sigh) I am back on my reindeer kick and have another fun treat that popped into my head: Reindeer Pretzel Treats.  These are easy to make and the combination of salt and sweet are a perfect treat for the taste buds. Why not whip them up and have them handy for that fun book or holiday TV special with the kids?

Reindeer Pretzel Treats

Makes 12

You will need:

1 bag of mini pretzels sticks
1 8oz bag of ghiradelli milk chocolate melting wafers
1 package of large edible eyes
1 package of M&M’s reds picked out
1 package of black candy melts
1 disposable piping bag
2 cookie sheets fitted with parchment paper

Directions:

Using a double boiler, melt the black candy melts

Once melted place into the disposable piping bag

Using one of the cookie sheets, pipe out 28 reindeer antlers (extras incase some break)

Set aside to harden

Using the double boiler again, melt the milk chocolate wafers

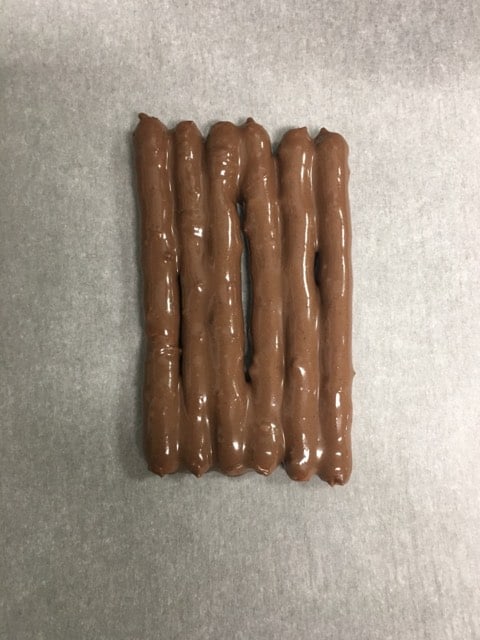
While the chocolate is melting group together 6 pretzel sticks for each reindeer

Once the chocolate is melted, drop 6 pretzel sticks into the chocolate

Using a fork, carefully pick up one at a time, lightly tapping the edge of the pot to get rid of extra chocolate

Place the stick onto the cookie sheet and repeat the step with the remaining 5 sticks, sticking next to each other to make one solid piece.

Once all 6 have been dipped, repeat steps with the remaining pretzel groups.

Once done then decorate

Place two eyes onto the pretzels

Place a red M&M under the eyes

Carefully peel off the antlers and place one on each top corner, let chocolate harden before enjoying.

The post Reindeer Pretzel Treats appeared first on Operation $40K.

Cranberry Vodka Cocktail

$
0
0
Seasonal. Festive. Flavorful. This Cranberry Vodka Cocktail is a treat for the senses and make use of the abundant holiday fruit: the cranberry.
You will need:
3 oz cranberry juice
1 oz vodka
1 oz peppermint vodka
splash Ginger Ale
Cranberries for garnish
Candy cane stick
Directions:
Mix together cranberry juice and vodka.
Pour over a ice.
Top with cranberries, candy cane and a splash of ginger ale.
Cranberry Vodka Cocktail
Author: 
Recipe type: Drinks
 
Using the seasonal fruit: the cranberry, you can whip up this great festive cocktail in just minutes!
Ingredients
  • 3 oz cranberry juice
  • 1 oz vodka
  • 1 oz peppermint vodka
  • splash Ginger Ale
  • Cranberries for garnish
  • Candy cane stick
Instructions
  1. Mix together cranberry juice and vodka.
  2. Pour over a ice.
  3. Top with cranberries, candy cane and a splash of ginger ale.

The post Cranberry Vodka Cocktail appeared first on Operation $40K.

Polar Bear Paw Cupcakes

$
0
0

This is reason number 1,221 to find your local Girl Scout and grab some Thin Mint cookies! Don’t worry — Miss Sarah can hook you up if need be, LOL. That is the “secret ingredient” to my Polar Bear Paw Cupcakes. It’s almost cookie time and these help take the bite out of the Wisconsin Winter Chill.

makes 12 cupcakes

You will need:

1/2 C sugar
1/4 C unsalted sweet cream butter, softened
1 large egg, room temperature
1 tsp baking powder
1/4 plus 1/8 tsp baking soda
1 cup all-purpose flour
1/4 plus 1/8 tsp salt
1/4 C heavy cream
1/4 C sour cream
Toppings for cupcakes
1/2 C melted butter
1 C sugar
1/2 C crushed candy canes

Cupcake directions:

Preheat oven to 350 degrees and line cupcake pan with liners

In a standing mixer beat sugar and butter until creamed

Add egg and mix until fully incorporated

Beat in vanilla extract, salt, baking soda, baking powder.

Combine the heavy cream into the wet mixture

Add in flour, a little at a time.

Add in the sour cream

Mix in the candy canes

Spoon batter about 1/2 full.

Bake in oven for about 22 minutes or until the center of the cupcake comes out clean with a toothpick.


Frosting ingredients

1 C unsalted sweet cream butter
3 C powder sugar
5 TBSP heavy whipping cream
1 tsp vanilla
3 C shredded coconut
12 Grasshopper cookies from Keebler
36 brown M&M’s

Frosting Directions:
Combine all ingredients, (except Grasshopper cookies), shredded coconut, and M&M’s into a standing mixer and mix on low speed until combined and stiff peaks form.
Pour coconut into a bowl and set aside
Using a butterknife, frost the cupcakes and set aside
Dip cupcakes into shredded coconut
Place a cookie onto the lower part of the cupcake
Place 3 M&M’s for the toes of the cupcakes
Enjoy

The post Polar Bear Paw Cupcakes appeared first on Operation $40K.

Beautiful Brownie Bunnies!

$
0
0

Fun. Whimsical. Yummy. That totally describes these beautiful brownie bunnies that we are sharing with you today!  Seriously, just look at how cute they are! They are REALLY easy to make too!

You will need:

1 9×13 box of brownie mix
eggs
oil
water
1 package of large edible eyes
3 egg whites
1/4 tsp cream of tarter
1/2 tsp vanilla extract
3 – 4 C powder sugar
brown gel food coloring
pink gel food coloring
2 piping bags fitted with a number 2 tip
1 squeeze bottle
1 cookie sheet fitted with parchment paper
1 9×13 baking dish fitted with parchment paper
1 bunny cookie cutter, about 4 inches in height

Directions:

Preheat oven to 350 degrees

Follow the directions on the back of the brownie box in order to bake the brownies

Tear off a large sheet of parchment paper so that the sides come up over the 9×13 baking dish

Pour brownie batter into the baking dish and bake in the preheated oven for 25-30 minutes or until a tooth pick comes out clean

Let brownies completely cool

Using a standing mixer, mix together the egg whites, cream of tarter, vanilla, and powder sugar and mix until stiff peaks form

Once the royal icing is made, spit into 2 bowls

Add a few drops of brown into 1 bowl and mix. Add in a few more drops to get the shade you want

Repeat step with the pink coloring in the second bowl

Scoop a little bit of icing into the piping bags

Add 2 teaspoons of water into the brown royal icing and mix until combined

Pour into the squeeze bottle

Carefully lift the parchment paper out of the baking dish with the brownies and place onto the counter

Using the cookie cutter, cut out 6 bunnies

Place cut out bunnies onto a cookie sheet

Using the piping bag with the brown icing, out line the shape of the bunnies head.

Fill in with the brown thinned icing

Add 2 large eyes into the center of the bunny

Let icing dry for 2 hours before adding the final details

Once the base layer is dry, using the pink piping bag, pipe a upside down triangle under the eyes

Pipe the pink for the ears

Using the brown icing, pipe cheeks on the bunny

Let the cheeks dry for an hour before adding on the small dots for the “whiskers”

Let bunny completely dry for an hour before enjoying!

Beautiful Brownie Bunnies!
Author: 
Recipe type: Dessert
Serves: 6 Bunnies
 
Ingredients
  • 1 9x13 box of brownie mix
  • eggs
  • oil
  • water
  • 1 package of large edible eyes
  • 3 egg whites
  • ¼ tsp cream of tarter
  • ½ tsp vanilla extract
  • 3 - 4 C powder sugar
  • brown gel food coloring
  • pink gel food coloring
  • 2 piping bags fitted with a number 2 tip
  • 1 squeeze bottle
  • 1 cookie sheet fitted with parchment paper
  • 1 9x13 baking dish fitted with parchment paper
  • 1 bunny cookie cutter, about 4 inches in height
Instructions
  1. Preheat oven to 350 degrees
  2. Follow the directions on the back of the brownie box in order to bake the brownies
  3. Tear off a large sheet of parchment paper so that the sides come up over the 9x13 baking dish
  4. Pour brownie batter into the baking dish and bake in the preheated oven for 25-30 minutes or until a tooth pick comes out clean
  5. Let brownies completely cool
  6. Using a standing mixer, mix together the egg whites, cream of tarter, vanilla, and powder sugar and mix until stiff peaks form
  7. Once the royal icing is made, spit into 2 bowls
  8. Add a few drops of brown into 1 bowl and mix. Add in a few more drops to get the shade you want
  9. Repeat step with the pink coloring in the second bowl
  10. Scoop a little bit of icing into the piping bags
  11. Add 2 teaspoons of water into the brown royal icing and mix until combined
  12. Pour into the squeeze bottle
  13. Carefully lift the parchment paper out of the baking dish with the brownies and place onto the counter
  14. Using the cookie cutter, cut out 6 bunnies
  15. Place cut out bunnies onto a cookie sheet
  16. Using the piping bag with the brown icing, out line the shape of the bunnies head.
  17. Fill in with the brown thinned icing
  18. Add 2 large eyes into the center of the bunny
  19. Let icing dry for 2 hours before adding the final details
  20. Once the base layer is dry, using the pink piping bag, pipe a upside down triangle under the eyes
  21. Pipe the pink for the ears
  22. Using the brown icing, pipe cheeks on the bunny
  23. Let the cheeks dry for an hour before adding on the small dots for the "whiskers"
  24. Let bunny completely dry for an hour before enjoying!

The post Beautiful Brownie Bunnies! appeared first on Operation $40K.

Viewing all 29 articles
Browse latest View live


Latest Images